|
| A heartbreaking sight... |
 |
| Courage old chap! You'll make it!! |
After a rather loooong hiatus, here I am back again! No semiconductor stuff this time, though! Let's go back in time (the late '50s) and resurrect a nice Graetz MW-SW tube radio! It was sent to me a couple of years ago to restore (along with a very interesting Marconiphone model which will appear in a future post) and this is the story of its coming back to life.
It was in rather heartbreaking conditions, all broken up, its nice bakelite casing in pieces (with some of them and the back cover missing) and everything covered up in years and years worth of grime and crud. (Click on the pictures for a larger version). One of the keys in front was missing, the power tranformer was burnt up, an IF can had a bad winding and - the worst - ALL of the RF coil pigtails at the underchassis were cut, probably by an industrious rodent which had left clear "marks" of its presence in several spots. Several other electrical problems became apparent during the restoration work, but they were not so serious.
 |
| RATS! Where are the coil pigtails? |
 |
| Keeping detailed notes is a must. |
Cleaning all that grimy mess of a chassis and case took a relatively long time and patience, but it was well worth it. When that task was complete, I started the electrical troubleshooting.
After ordering and installing a suitable new tranformer, I gradually checked and restored each stage. Surpisingly, most of the capacitors were OK! If memory serves, I found only a couple that had developed leakage. The reservoir electrolytic had more than its nominal capacitance and normal ESR.
 |
| Starting to look like a radio again... |
It was during the testing of each component that I found that the
IF can had a bad winding and opened it up to fix it. Fortunately, that proved easy. Finding where every RF coil should be connected on the bandswitch assembly was certainly the "funniest" part of the restoration! I also had to fit a new
dial string, as the old one was badly frayed. After this was finally accomplished, the chassis was powered up and a voltage mesurement test showed some small remaining problems, which were quickly corrected. I found that the rectifier tube had gone bad and replaced it with
silicon diodes in series with resistors, which were soldered on the tube
socket lugs. That eased the burden on the transformer, too. It's very
easy to remove them and fit a tube, if ever required. A loud hum could be heard when touching the grid of the audio amplifier tube, but no stations (of course) could yet be received.
To make a long story short, after restoring the function of every stage, I fully realigned the radio and it gradually came to life. First I aligned the IF, then the RF stages. Getting the dial indications to precisely correspond to the actual frequency is a very rewarding procedure. Stations started pouring in when I attached a wire antenna, and all of the wavebands became operational.
 |
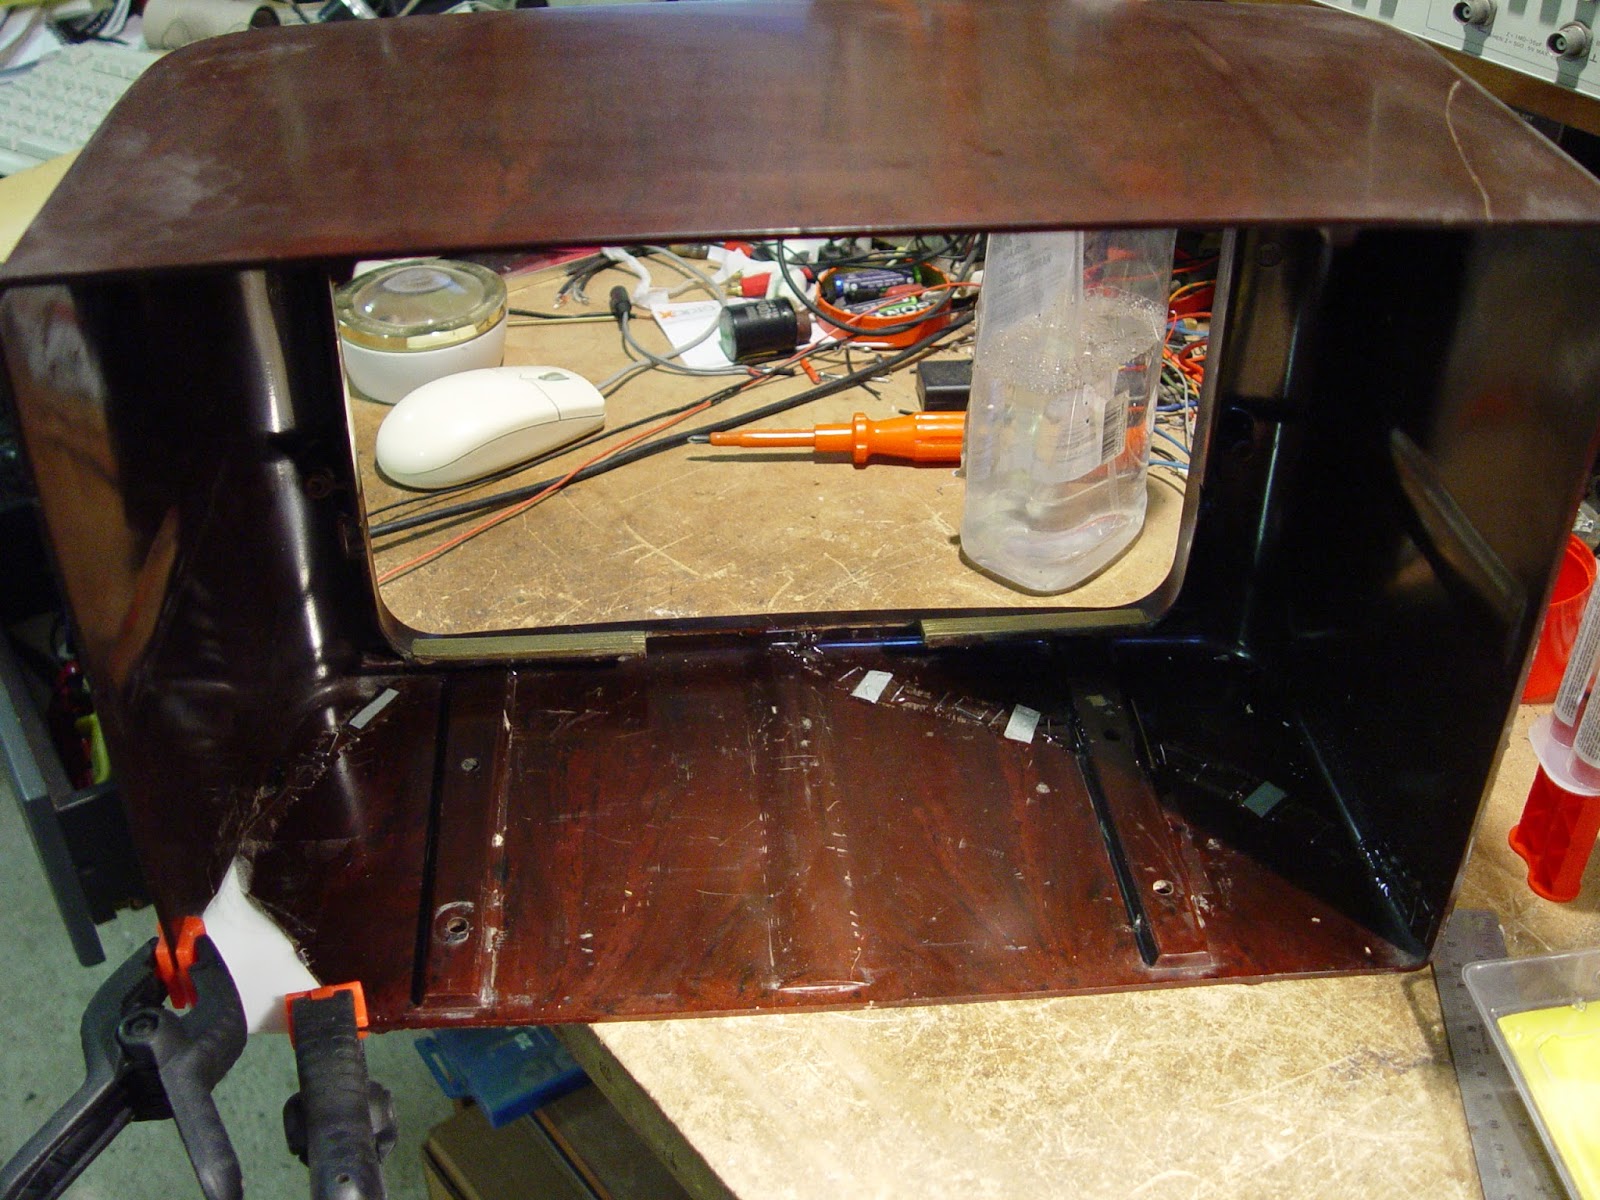
| Putting the case back in one piece! |
 |
| Alignment in progress... |
Putting the broken bakelite case together was another challenge. I used epoxy glue and metal reinforcing clips to accomplish this. I formed, glued and painted a plexiglass sheet to put in place of a missing corner. Every brass part and insert of the front side was carefully cleaned, polished and protected with a thin acrylic coating. The speaker cloth was replaced with a new one. I was lucky to find a nice suitable replacement piece of cloth at a furniture shop. The case was finished up with gold paint because the original had faded with the years, and after several hours it was finally ready. I polished the bakelite with a silicone oil saturated cloth, which made it really shiny again and gave it a great colour and "depth". I made a complete back side cover out of thin plywood, as the original cover was lost (turns out I didn't take a photo of the cover).
 |
| The back side of the finished set. |
 |
| Finished and singing! |
Restoring an old tube radio is a very
gratifying, educational and relaxing experience, especially when it's in the really bad shape the Graetz was delivered to me. It requires a lot of patience and time, but in my opinion it's worth it. When you hear the first stations booming in after who knows how many years, it feels like you've given life back to a dear old friend. That particular smell emanating after the set warms up brings me back to my childhood, spending long night hours listening to my mother's Grundig 97WE (which still functions great!) to curious, noisy, wavering signals that arrived from the other side of the globe to my single wire antenna, strung out the window. Mysterious noises, warbles, twitters, whistles, strange music and serious, stentorean voices filled up my eager ears and made me wonder how it was ever possible for all those ethereal signals to travel so far and what each of them was. Listening to such signals coming from an old radio you've just restored to life is an
indescribably joyful experience.
Please don't throw those marvels of yesteryear away! If you don't want them, please try to find someone who appreciates them! They're a very important and beautiful piece of our technological history.
The Marconiphone radio restoration is another epic story, soon to be told!